
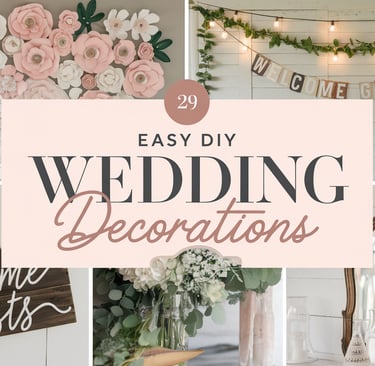
12 Stunning DIY Wedding Decorations & Centerpieces for a Dreamy Day
We know wedding planning can feel overwhelming, especially with that never-ending to-do list and your budget quickly shrinking, but what if you could create a magical day without stressing over costs? DIY decorations are not only budget-friendly but also a wonderful way to add your personal touch, making your wedding day truly unique! This guide will help you create 12 beautiful and affordable DIY decorations and centerpieces. With these simple ideas, you can craft a celebration that’s both unforgettable and totally you! Let’s make your big day special—without breaking the bank!
2/25/20256 min read

12 Stunning DIY Wedding Decorations & Centerpieces for a Dreamy Day
We know wedding planning can feel overwhelming, especially with that never-ending to-do list and your budget quickly shrinking, but what if you could create a magical day without stressing over costs? DIY decorations are not only budget-friendly but also a wonderful way to add your personal touch, making your wedding day truly unique!
This guide will help you create 12 beautiful and affordable DIY decorations and centerpieces. With these simple ideas, you can craft a celebration that’s both unforgettable and totally you! Let’s make your big day special—without breaking the bank!
Rustic Charm: DIY Wood Slice Centerpieces
Bring the outdoors in with rustic wood slice centerpieces. These earthy elements add warmth and charm to your wedding decor. They're surprisingly easy to make, so lets dig in!
Simple Wood Slice Candle Holders
These candle holders give off a warm, inviting glow. They're perfect for creating a cozy atmosphere. So simple, yet so elegant!
Materials: Wood slices, drill, drill bits (sized for tea lights/votives), sandpaper, tea lights or votives.
How-to:
Sand the wood slices to smooth any rough edges.
Use the drill to make holes in the center of each wood slice. Make sure the holes are big enough for your tea lights or votives to fit snugly.
Be careful when drilling! Use a clamp to hold the wood slice steady.
Place a tea light or votive into each hole.
Arrange on tables for a beautiful, rustic touch.
Picture This: Imagine a warmly lit table setting with these wood slice candle holders. Doesn't that sound amazing?
Elevated Wood Slice Floral Arrangements
Take your wood slice centerpieces to the next level. This tiered arrangement is a showstopper. Guests will definitely admire this centerpiece.
Materials: Wood slices (different sizes), floral foam, flowers (wildflowers or your favorites!), glue gun.
How-to:
Start by gluing the largest wood slice to a slightly smaller one. Then, glue a smaller one on top.
Continue until you have a tiered effect.
Cut the floral foam to fit the top wood slice. Use the glue gun to secure it.
Arrange your flowers in the floral foam. Have fun with it!
Make sure the arrangement is balanced and beautiful.
Picture This: Think of a multi-tiered wood slice centerpiece overflowing with wildflowers. Gorgeous!
Wood Slice Table Numbers
Keep it simple with these elegant table numbers. This is a simple way to display table numbers. It is pretty and rustic!
Materials: Wood slices, paint or marker, stencils (optional).
How-to:
Paint or stain your wood slices if desired. Let them dry completely.
Use stencils or freehand to write table numbers on each slice.
A simple font adds to the rustic charm.
Prop them up on tables.
Or lean them against other decorations.
Picture This: Picture a wood slice table number propped up perfectly on a beautifully decorated table.
Romantic Glow: DIY Candle & Lantern Decor
Candlelight sets the mood for a romantic wedding. Use these DIY candle and lantern ideas to create a warm glow. Lighting can totally transform a space!
Mason Jar Lanterns with Twine & Lace
These lanterns are both classic and affordable. The twine and lace add a touch of elegance. They're a perfect touch.
Materials: Mason jars, twine, lace, tea lights or battery-operated candles.
How-to:
Wrap twine around the top of each mason jar. Secure with glue.
Glue a strip of lace around the center of each jar.
Place a tea light or battery-operated candle inside.
Hang them from trees or line a walkway.
The result is pure magic!
Picture This: Imagine mason jar lanterns hanging from trees or lining a walkway.
Floating Candle Centerpieces
Elegant and easy, these centerpieces are stunning. They're a simple way to add a touch of sophistication. Prepare to be wowed!
Materials: Glass bowls, water, floating candles, flowers (optional).
How-to:
Fill the glass bowls with water.
Add a few floating candles to each bowl.
Scatter some flowers around the candles for extra flair.
Consider using petals or small blooms.
That's it! Simple, yet stunning.
Picture This: Envision floating candle centerpieces with delicate flowers.
Painted Wine Bottle Candle Holders
Upcycle old wine bottles into stylish candle holders. It's a creative and eco-friendly way to decorate. Plus, they look amazing!
Materials: Wine bottles, paint, sandpaper, candles, rhinestones.
How-to:
Paint the wine bottles in your desired colors or leave them as is. If you are going to add anything to them, you will need to add a base coat, give them a base coat if gluing rhinestones.
Let the paint dry completely.
Use sandpaper to distress the bottles. This gives them a vintage look. If adding bling, you will need to glue on the rhinestones, Amazon has rhinestone ribbon and many rhinestone options.
Insert candles into the tops of the bottles. (bonus tip, buy small candle holders from the dollar store, glue them on top (with strong glue) and cover them in paint, rhinestones or ribbon. Grab battery operated candles to avoid open flames.
Arrange them in varying heights for visual interest.
Picture This: A collection of painted wine bottle candle holders in varying heights will look amazing.
Floral Fantasy: DIY Flower Arrangements & Garlands
Flowers are a must-have for any wedding. These budget-friendly floral options will make your day beautiful without breaking the bank. Get ready to get your hands dirty and have some fun!
Baby's Breath Garland
Baby's breath is simple, affordable, and romantic. A garland made of it adds a delicate touch to your decor. Its simplicity is beautiful!
Materials: Baby's breath, floral wire, floral tape.
How-to:
Cut the baby's breath into small sprigs.
Attach the sprigs to the floral wire using floral tape.
Continue until the garland is the desired length.
Drape it across tables or archways.
It's a simple way to add romance.
Picture This: Picture baby's breath garland draped across a table or archway.
Wildflower Bouquet Centerpieces
Embrace the natural beauty of wildflowers. These bouquets are rustic and charming. Simple, yes, but totally beautiful!
Materials: Wildflowers, vases or jars, floral foam (optional).
How-to:
Gather your wildflowers.
Arrange them in vases or jars.
Use floral foam to help keep the arrangement in place.
Don't be afraid to mix and match different types of flowers.
The more variety, the better!
Picture This: A rustic wildflower bouquet in a mason jar is a gorgeous centerpiece.
Paper Flower Backdrop
Create a stunning backdrop with paper flowers. This is a budget-friendly way to make a big statement. The possibilities are endless with this DIY project.
Materials: Cardstock, scissors, glue, templates (optional).
How-to:
Cut out flower shapes from cardstock using templates or freehand.
Assemble the flowers by layering and gluing the petals.
Create a backdrop by attaching the flowers to a wall or frame.
Mix different colors and sizes for a more dynamic look.
Wow your guests with your artistry!
Picture This: Envision a colorful and textured paper flower backdrop.
Personalized Touches: DIY Signage & Decor
Add personal touches to your wedding with DIY signage and decor. It's a way to show your personality as a couple. Express yourself!
Wooden Welcome Sign
Greet your guests with a warm and inviting welcome sign. It sets the tone for the entire celebration. First impressions matter!
Materials: Wood plank, paint or stain, stencils or freehand lettering.
How-to:
Paint or stain the wood plank. Let it dry.
Use stencils or freehand to add a welcome message.
Consider adding your names and wedding date.
Display it at the entrance to your wedding venue.
Make your guests feel at home.
Picture This: A rustic wooden welcome sign with elegant lettering is charming.
Photo Booth Backdrop with Personalized Props
Create a fun and interactive photo booth experience. Your guests will love taking pictures with personalized props. Capture those memories!
Materials: Fabric backdrop, string lights, personalized props (signs, hats, etc.).
How-to:
Set up the fabric backdrop.
Add string lights for a festive touch.
Create or source personalized props. Think signs with funny sayings, hats, and masks.
Encourage your guests to get creative and have fun!
They'll be talking about it for years to come.
Picture This: Imagine a fun and festive photo booth backdrop with guests posing with props.
Calligraphy Seating Chart
Guide your guests to their seats with an elegant calligraphy seating chart. It's a personalized way to add a touch of class. Get ready to impress.
Materials: Large mirror or chalkboard, calligraphy pen or marker.
How-to:
Clean the mirror or chalkboard.
Use a calligraphy pen or marker to write guests' names and table numbers.
Arrange the names alphabetically or by table.
Display the seating chart in a prominent location.
Your guests will appreciate the effort!
Picture This: Visualize an elegant calligraphy seating chart displayed beautifully.
Creative Conclusions...
DIY wedding decorations and centerpieces offer a fantastic way to save money and infuse your special day with personal touches. From rustic wood slices to romantic candlelit lanterns and personalized signage, the options are endless. By embracing your creativity and getting crafty, you can create a wedding that is both beautiful and meaningful, reflecting your unique love story. So, grab your glue gun, gather your supplies, and get ready to make some wedding magic happen!